


CONDITIONAL SENTENCES
Conditional sentences are sentences involving a supposition (“if”) and a conclusion (“then”) depending on that supposition. The if-clause is called the “protasis,” and the conclusion is the “apodosis.” The conditional clause is one of the most important in Greek syntax.Conditional sentences are divided into three types, according to the meaning of the protasis. They are:
1. Type I :Real Conditional
2. Type II: Hypothetical conditional
3. Type III : Impossible conditional
Form:
Type I ( If + Present simple) + (present simple)
Type II If + Simple past + would
Type III If + Past perfect + Perfect conditional
(If + past perfect) (would have )
1. Type I :Real Conditional
From : If + Simple present + will
Example:
& nbsp; &nbs p; If Neil fails the exam, he will be able to take it again
If you give it to me, I’ll let you go
2.Type II : Hypothetical conditional
Form : If + Simple past + would
Example :
a. If I had a lot of money, I would give some away to that charity
b. If a stranger asked me for money, I wouldn’t give him any
3.Type III : Impossible conditional
Form : (If + past perfect)+ (would have )
Example :
a. If I had taken my umbrella, I wouldn’t have got wet
b. If I had studied phonetics as well, I’d have passed the exam
Practice Exercise
Complete each sentence below by giving the correct for of the verb in parentheses.
1. Whenever my roommate ________ (snore) loudly, I cannot sleep.
2. If the city ________ (expand) the parking lot space downtown, we would not have to park so far away from the movie theatre.
3. If it ................... (snow), we won’t ................... (go) to school
4. If dedy ...................(enter) the competition, he will win
5. ayu ________ (not pass) her driving test unless she calms down.
6. If it__________(be) winter, all these trees would be in snow.
7. Had it not rained, the farmers ________(lose) all of their crops.
8. If the airplane had not had a mechanical problem, we probably ________
(arrive) in Winnipeg by now.
9. We ________(lie) on the beach in Mexico right now if we had been able to get our visas on time.
10. If you (study)…….. for the test, you (pass)………… it.
Answers
1. Whenever my roommate snores loudly, I cannot sleep.
2. If the city expanded the parking lot space downtown, we would not have to park so far away from the movie theatre.
3. If it snows, we won’t go to school
4. If dedy enters the competition, he will win
5. ayu will not pass her driving test unless she calms down.
6. If it were winter, all these trees would be covered in snow.
7. Had it not rained, the farmers would have lost all of their crops.
8. If the airplane had not had a mechanical problem, we probably would have arrived in Winnipeg by now.
9. We would be lying on the beach in Mexico right now if we had been able to get our visas on time.
10. if you Had studied for the test,you Would have pass it.
Rabu, 04 November 2009
Minggu, 25 Oktober 2009
inquiry letter
To
Dear Purchasing Manager
cokelat unik restaurant
Jln.kali abang tengah
North bekasi
dear sirs,
Sincerely,
By this we submitted a letter of request to the Mother of the products produced capital as follows:
1) .. Brilliant Liquid Hand Soap
Compare this with the regular market price of almost Rp. 125.000, - per 5 gallons of content Liter, and the number of outlets in cokelat unik Restaurant is + / - 170 Outlet is able to
Doing savings Rp. 12,750,000, - per month
Here we provide samples to test wash
So the letter we sent this request in the hope that relations will be beneficial in both the future and if there are any questions please contact us on 021 0218880181or aircraft into our HP 08569600453. the attention and discretion that is given before we thank you.
Sincerely
kharisma hand shoap,
mulyanto
Kamis, 08 Januari 2009
MIKROTIK
MIKROTIK
MikroTik RouterOS™ adalah sistem operasi dan perangkat lunak yang dapat digunakan untuk menjadikan komputer manjadi router network yang handal, mencakup berbagai fitur yang dibuat untuk ip network dan jaringan wireless, cocok digunakan oleh ISP dan provider hotspot.
SEKILAS TENTANG MIKROTIK
SEKILAS TENTANG MIKROTIK
Mikrotik sekarang ini banyak digunakan oleh ISP, provider hotspot, ataupun oleh pemilik warnet. Mikrotik OS menjadikan computer menjadi router network yang handal yang dilengkapi dengan berbagai fitur dan tool, baik untuk jaringan kabel maupun wireless.
Dalam tutorial kali ini penulis menyajikan pembahasan dan petunjuk sederhana dan simple dalam mengkonfigurasi mikrotik untuk keperluan-keperluan tertentu dan umum yang biasa dibutuhkan untuk server/router warnet maupun jaringan lainya, konfirugasi tersebut misalnya, untuk NAT server, Bridging, BW manajemen, dan MRTG.
Versi mikrotik yang penulis gunakan untuk tutorial ini adalah MikroTik routeros 2.9.27
Akses mirotik:
via console
Mikrotik router board ataupun PC dapat diakses langsung via console/ shell maupun remote akses menggunakan putty (www.putty.nl)
via winbox
Mikrotik bisa juga diakses/remote menggunakan software tool winbox
via web
Mikrotik juga dapat diakses via web/port 80 dengan menggunakan browser
Untuk Informasi selengkapnya, kunjungi www.mikrotik.com atau www.mikrotik.co.id
Cara Install Mikrotik ROuter Os
2.1. Installasi Mikrotik OS Dari CD – Room
Sebelum anda memulai proses installasi Mikrotik OS terlebih dahulu setting BIOS Setup pada PC anda agar first boot dari CD-Room.
Setelah “Boot Device Order” dirubah, simpan kemudian letakkkan CD Room Mikrotik OS pada drive CDROOM dan boot ulang computer. Setelah booting maka computer akan mengunakan CDROOM sebagai boot media pertama dan tampilan pada gambar sebagai berikut :
- Booting melalui CDROOM :

- Setelah proses booting akan muncul menu pilihan paket software yang akan diinstall. Paket system merupakan paket utama yang mengatur system operasional Mikrotik, pilih sesuai dengan kebutuhan yang akan direncanakan dalam pembuatan paket Router.

Untuk memilih semua paket dapat dilakukan dengan memilih”a” atau “m” jika anda hanya ingin menginstall secara minimum atau Mikrotik system saja.Setelah anda memilih anda dapat segera melakukan instalasi dengan menekan “i” dan akan muncul menu seperti dibawah ini :
- Do you want to keep old configuration ? [ y/n] ketik Y
- Continue ? [ y/n] ketik Y
Jika anda memilih”y” maka konfigurasi dan lisensi yang pernah dipasang didalam harddisk tersebut akan disimpan dan dapat digunakan lagi oleh mikrotik saat booting pertama setelah proses instalasi. Jika pada harddisk telah tersedia lisensi level 1 kebawah, dan anda memlih “y” mikrotik tidak akan memperdulikan dan menghapus lisensi tersebut. Anda dapat mendapatkan kembali lisensi level 1 tersebut kembali menggunakan account server diwebsit mikrotik.
Setelah itu proses installasi system dimulai, disini kita tidak perlu membuat partisi hardisk karena secara otomatis dia akan membuat partisi sendiri.
Proses Installasi

- Setelah proses installasi selesai maka kita akan di minta untuk merestart system, tekan enter untuk merestart system.

5. Setelah computer booting kembali ke system mikrotik, akan ada pilihan untuk melakukan check system disk, tekan “ y “

6. Setelah itu akan muncul menu login
Mikrotik login = admin
Password = ( kosong , enter saja )

- Untuk software license tekan“ y “ . Lalu enter beberapa kali sampai muncull prompt untuk command line.


Prompt command line
BAB II
PERINTAH DASAR
Basic Command
Summary on executing the commands and navigating the menus
| Command | Action |
| command [Enter] | Executes the command |
| [?] | Shows the list of all available commands |
| command [?] | Displays help on the command and the list of arguments |
| command argument [?] | Displays help on the command's argument |
| [Tab] | Completes the command/word. If the input is ambiguous, a second [Tab] gives possible options |
| / | Moves up to the base level |
| /command | Executes the base level command |
| .. | Moves up one level |
| "" | Specifies an empty string |
| "word1 word2" | Specifies a string of 2 words that contain a space |
2.2. Commands
log/ -- System logsquit -- Quit consoleradius/ -- Radius client settingscertificate/ -- Certificate managementspecial-login/ -- Special login usersredo -- Redo previously undone actiondriver/ -- Driver managementping -- Send ICMP Echo packetssetup -- Do basic setup of systeminterface/ -- Interface configurationpassword -- Change passwordundo -- Undo previous actionport/ -- Serial portsimport -- Run exported configuration scriptsnmp/ -- SNMP settingsuser/ -- User managementfile/ -- Local router file storage.system/ -- System information and utilitiesqueue/ -- Bandwidth managementip/ -- IP optionstool/ -- Diagnostics toolsppp/ -- Point to Point Protocolrouting/ -- Various routing protocol settingsservice/ -- IP servicessocks/ -- SOCKS version 4 proxyarp/ -- ARP entries managementupnp/ -- Universal Plug and Playdns/ -- DNS settingsaddress/ -- Address managementaccounting/ -- Traffic accountingthe-proxy/ --vrrp/ -- Virtual Router Redundancy Protocolpool/ -- IP address poolspacking/ -- Packet packing settingsneighbor/ -- Neighborsroute/ -- Route managementfirewall/ -- Firewall managementdhcp-client/ -- DHCP client settingsdhcp-relay/ -- DHCP relay settingsdhcp-server/ -- DHCP server settingshotspot/ -- HotSpot managementipsec/ -- IP securityweb-proxy/ -- HTTP proxy BAB III
SETTING IP ADDRESS, GATEWAY & NAME SERVER
3.1 IP Address
Sebelum kita mengkonfigurasi IP Address dan proses routing terlebih dahulu kita check apakah interface ( ether )sudah terdeteksi atau belum. Jika eternet card kita sudah plug and play dalam system mikrotik maka secara otomatis akan muncul.
Bentuk perintah konfigurasi IP address :
Ip address add address = { ip address / netmask }
Interface = { nama interface, ether 1 atau ether 2 bila ada 2 network card }
Contoh konfigurasi :
[admin@MikroTik] ip address> add address 10.0.0.217/24 [admin@MikroTik] ip address> add address 192.168.0.254/24[admin@MikroTik] ip address> printFlags: X - disabled, I - invalid, D - dynamic # ADDRESS NETWORK BROADCAST INTERFACE 0 10.0.0.217/24 10.0.0.217 10.0.0.255 Public 1 192.168.0.254/24 192.168.0.0 192.168.0.255 Local[admin@MikroTik] ip address> Perintah ip address print adalah untuk melihat hasil dari konfigurasi.
3.2 Gateway
Bentuk perintah konfigurasi :
Ip route add gateway ={ ip gateway }
Contoh Konfigurasi :
[admin@MikroTik] ip route> add gateway=10.0.0.1[admin@MikroTik] ip route> printFlags: X - disabled, I - invalid, D - dynamic, J - rejected,C - connect, S - static, R - rip, O - ospf, B - bgp # DST-ADDRESS G GATEWAY DISTANCE INTERFACE 0 ADC 192.168.0.0/24 Local 1 ADC 10.0.0.0/24 Public 2 A S 0.0.0.0/0 r 10.0.0.1 0 Public[admin@MikroTik] ip route> Perintah ip route print adalah untuk melihat routing table.
3.3 Name Server
Bentuk perintah konfigurasi :
Ip dns set primary-dns= { dns utama }
Secondary-dns={ dns kedua }
Contoh konfigurasi :
[admin@MikroTik]> ip dns set primary-dns=213.85.50.120 secondary-dns=213.85.50.121[admin@MikroTik]>ip dns print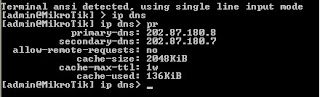

Perintah ip dns print adalah untuk melihat hasil dari konfigurasi dns
BAB IV
SETTING ROUTING
Router adalah sebuah device yang berfungsi untuk meneruskan paket-paket dari sebuah network ke network yang lainnya baik dari LAN ke LAN atau ke WAN sehingga host-host yang ada pada sebuah network bias berkomunikasi dengan host-host yang ada pada network yang lain.
Tujuan dari routing adalah agar paket IP kita dikirim sampai pada target, begitu juga paket IP yang ditujukan untuk kita samapai dengan baik. Target atau destination ini bias berada dalam 1 jaringan ataupun berbeda jaringan baik secara topologis maupun geografis.
4.1 Routing Static
Bentuk perintah konfigurasi :
Ip route add dst-address= {ip network atau ip host yang dituju }
Gateway= {ip gateway untuk melewati paket }
Contoh konfigurasi :
Artinya tujuan network 192.168.0.0/24 lewat gateway 10.0.0.1
4.2 Routing untuk 2 ISP
Routing untuk 2 ISP atau lebih ini bias kita analogikanm ketika kita dihadapkan pada masalah pemakaian 2 atau lebih koneksi, salah satu permasalahannya juga adalah apabila 2 ISP pertama memberikan bandwith yang berbeda dengan ISP yang kedua, hal ini bias kita lakukan dengan mikrotik yaitu dengan membagi balanced paket data ( Static Equal Cost Multi-Path Routing ).
Contoh perintah konfigurasi :
Ip route add gateway=192.168.1.1,192.168.2.1,192.168.2.1
Catatan:
Perintah diatas mendefinisikan bahwa besar bandwidth dari gateway 192.168.2.1 lebih besar 2 kali lipat dari bandwidth yang didapat dari gateway 192.168.1.1, jadi bias dirtikan untuk routing lebih dari 1 ISP ini harus diketahui besar bandwidth mana yang lebih besar yang diberikan setelah itu kita bias masukkan konfigurasi seperti diatas.
BAB V
NETWORK ADDRESS TRANSLATION &
TRANSPARENT PROXY SERVER WITH WEB PROXY
Network Address Translation ( NAT )
Misi awal internet adalah sebagai jaringan komunikasi non profit. Pada awalnya, internet didesain tanpa memperhatikan dunia bisnis. Kemudian hal ini menjadi maslah sekarang dan dimasa depan. Dengan semakin banyaknya penghuni internet, baik pencari informasi maupun penyedia informasi, maka kebutuhan akan pengalamatan di internet makin membengkak. Kebutuhan besar akan IP Address biasanya terjadi di jaringan computer perusahaan dan LAN-LAN di lembaga pendidikan.
IP Address sebagai sarana pengalamatan di Internet semakin menjadi barang mewah dan eksklusif. Tidak sembarang orang sekarang ini mendapatkan IP Address Public dengan mudah. Oleh karena itulah dibutuhkan suatu mekanisme yang dapat menghemat IP Address. Logika sederhana untuk penghematan IP Address ialah dengan men-share suatu nomor IP Address Public ke computer client lainnya. Atau dengan kata lain beberapa computer bias mengakses Internet walau kita hanya memiliki satu IP Address Public. Salah satu mekanisme itu disediakan oleh Network Address Translation (NAT).
Bentuk perintah konfigurasi :
Ip firewall nat add chain=srcnat
Action=masquerade
Out-interface= {ether yang langsung terhubung ke internetlangsung atau public }
Contoh konfigurasi :
[admin@MikroTik]> ip firewall nat add chain=srcnat action=masquerade out-interface=ether1
Perintah ip firewall nat print adalah untuk melihat table nat
Transparent Proxy Server
Proxy Server merupakan program yang dapat mempercepat akses ke suatu web yang sudah diakses oleh computer lain, karena sudah disimpan didalam chaching server.
Transparent Proxy menguntungkan dalam management client, karena system administrator tidak perlu lagi melakukan setup proxy disetiap browser computer client karena redirection dilakukan otomatis disisi server.
Bentuk perintah konfigurasi :
1. Setting web proxy
· Ip proxy set enabled=yes
Port= { port yang mau digunakan }
Maximal-client-connections=1000
Maximal-server-connections=1000
· Ip proxy direct add src-address = {network yang akan di NAT }
Action=allow
· Ip web-proxy set parent-proxy={proxy parent/optional}
Hostname={nama host untuk proxy/optional}
Port={port yang mau digunakan}
Src-address={address yang akan digunakan untuk koneksi ke parent proxy/default 0.0.0.0 }
Transparent-proxy=yes
Max-object-size={ukuran maximal file yang akan disimpan sebagai cache/default 4096 in kilobytes}
Max-chache-size={ukuran maximal harddisk yang akan dipakai sebagai penyimpanan file chache / unlimited | none| 12 in megabytes}
Cache-administrator={email administrator yang kan digunakan apabila proxy error, status akan dikirim ke email tersebut}
Enabled=yes
Contoh konfigurasi :
[admin@MikroTik]>ip proxy set enabled=yes port=3128 maximal-client-connecions=1000 maximal-server-connectons=1000
[admin@MikroTik]>ip proxy direct add src-address=192.168.0.0/24 action=allow
Ip web-proxy print adalah untuk melihat hasil konfigurasi web-proxy
Ip web-proxy monitor adalah untuk monitoring kerja web proxy
- Setting firewall untuk transparent proxy
Bentuk perintah konfigurasi :
Ip firewall nat add chain=dstnat
Protocol=tcp
Dst-port=80
Action=redirect
To-ports={port proxy}
Contoh konfigurasi :
[admin@MikroTik]>ip firewall nat add chain=dstnat protocol=tcp dst-port80 action=redirectto ports=3128
Ip firewall nat>print adalah untuk melihat setting firewall untuk transparent proxy
BAB VI
DHCP SERVER
DHCP merupakan singkatan dari Dynamic HostConfiguration Protocol, yaitu suatu program yang memungkinkan pengaturan IP Address di dalam sebuah jaringan dilakukan terpusat di server, sehingga PC di client tidak perlu melakukan konfigurasi IP Address. DHCP memudahkan administrator untuk melakukan pengalamatan IP Address untuk client.
Bentuk perintah konfigurasi :
Ip dhcp-server setup
Dhcp server interface ={interface yang digunakan }
Dhcp server space ={network yang akan di dhcp}
Gateway for dhcp network ={IP gateway }
Address to giveout = {range IP address}
Dns servers ={name server}
Lease time ={waktu sewa yang diberikan}
Contoh konfigurasi DHCP server :
/ip pool add name=dhcp-pool ranges=172.16.0.10-172.16.0.20/ip dhcp-server network add address=172.16.0.0/12 gateway=172.16.0.1/ip dhcp-server add interface=wlan1 address-pool=dhcp-pool Contoh konfigurasi DHCP Client :
/ip dhcp-client add interface=wlan1 use-peer-dns=yes \ add-default-route=yes disabled=no[admin@Server] ip dhcp-client> print detailFlags: X - disabled, I - invalid 0 interface=wlan1 add-default-route=yes use-peer-dns=yes status=bound address=172.16.0.20/12 gateway=172.16.0.1 dhcp-server=192.168.0.1 primary-dns=159.148.147.194 expires-after=2d23:58:52[admin@Server] ip dhcp-client> BAB VII
BANDWIDTH MANAGEMENT
QoS memegang peranan sangat penting dalam hal memberikan pelayanan yang baik pada client. Untuk itu kita memerlukan bandwidth management untuk mengatur tiap data yang lewat, sehingga pembagian bandwidth menjadi adil.
Dalam hal ini Mikrotik RouterOs juga menyertakan paket software untuk management bandwidth..
Contoh Implementasinya seperti dibawah ini :
· Cara 1
Bentuk perintah konfigurasi :
Queue simple add name={nama}
Target-addresses={ip address yang dituju}
Interface={interface yang digunakan untuk melewati data}
Max-limit={out/in}
Contoh konfigurasi :
[admin@MikroTik] queue tree> add name=ClassA parent=Local max-limit=2048000[admin@MikroTik] queue tree> add name=ClassB parent=ClassA max-limit=1024000[admin@MikroTik] queue tree> add name=Leaf1 parent=ClassA max-limit=2048000 \\... limit-at=1024000 packet-mark=packet_mark1 priority=8[admin@MikroTik] queue tree> add name=Leaf2 parent=ClassB max-limit=1024000 \\... limit-at=256000 packet-mark=packet_mark2 priority=7[admin@MikroTik] queue tree> add name=Leaf3 parent=ClassB max-limit=1024000 \\... limit-at=768000 packet-mark=packet_mark3 priority=8[admin@MikroTik] queue tree> printFlags: X - disabled, I - invalid 0 name="ClassA" parent=Local packet-mark="" limit-at=0 queue=default priority=8 max-limit=2048000 burst-limit=0 burst-threshold=0 burst-time=0s 1 name="ClassB" parent=ClassA packet-mark="" limit-at=0 queue=default priority=8 max-limit=1024000 burst-limit=0 burst-threshold=0 burst-time=0s 2 name="Leaf1" parent=ClassA packet-mark=packet_mark1 limit-at=1024000 queue=default priority=8 max-limit=2048000 burst-limit=0 burst-threshold=0 burst-time=0s 3 name="Leaf2" parent=ClassB packet-mark=packet_mark2 limit-at=256000 queue=default priority=7 max-limit=1024000 burst-limit=0 burst-threshold=0 burst-time=0s 4 name="Leaf3" parent=ClassB packet-mark=packet_mark3 limit-at=768000 queue=default priority=8 max-limit=1024000 burst-limit=0 burst-threshold=0 burst-time=0s[admin@MikroTik] queue tree> · Cara 2
- Browse IP Router lewat Internet Browser
- Masuk ke menu simple Queues
Lalu isi seperti yang direncanakan :
Keterangan :
· Name : Nama untuk class
· Out-limit : Bandwidth yang keluar atau uplink
· In-Limit : Bandwidth yangmasuk atau downlink
· Target-Ip : IP Address yang dituju
· Interface : Ethernet yang digunakan untuk keluar datamenuju target IP
· Time : Waktu yang diberikan untuk pemakaian bandwidth
Langganan:
Postingan (Atom)


.jpg)